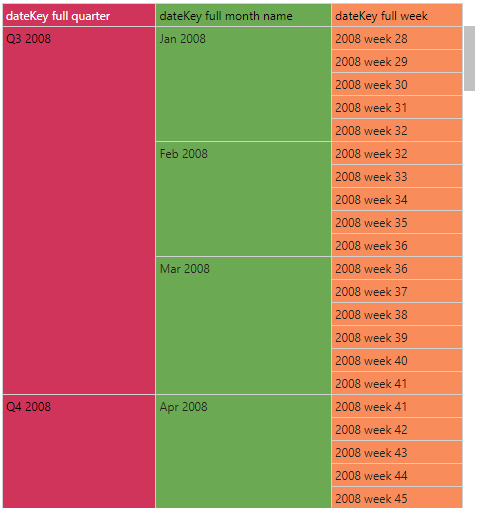
The Time Intelligence node is used to calculate and produce various date-time values (stored in new columns), based on a source date-time column. The new columns are organized into different levels of granularity, like year, quarter, month, week, and day. For instance, the grid in the image below shows the quarter, month, and week for each year in the dateKey column.
If the data set includes a date or date-time column, the user can build time intelligence into the model by adding a Time Intelligence node. This powerful feature determines all the necessary calculations and settings for creating date/ time analytics based on the given date/ time column. It generates the specified time intelligence columns (for example, quarters, months, and weeks), enabling users to add those columns to queries later on, and to build advanced time intelligence calculations.
Configuring Time Intelligence at the data flow stage creates additional logical columns and places them into a separate time intelligence display folder. It also enables the building of date hierarchies later on, which is important if you want to enable drill functions for dates.
Other Date Time Functions
The Time Intelligence node differs from the Add Date Time node, which adds a column in which each row lists the exact same date or date/ time. The Time Intelligence node, on the other hand, is used to generate a variety of date-time columns based on different date parts, like year, quarter, month, etc.
- Click here to learn about the Add Date Time node.
The Time Intelligence node also differs from the Date Range node, which is used to add a column that lists a range of consecutive dates based on an existing date-time column, or based on a given start and end date.
- Click here to learn about the Date Range node.
Time Intelligence and Time Calculations
While Model offers Time Intelligence logic while building constructing your data model, Discover offers date/ time logic with the Time Calculation wizard and
Custom Column Date Parts. The Time Calculation wizard complements the Time Intelligence columns added to the data model, using those columns to perform a range of complex calculations. Custom Column Date Parts, on the other hand, are generally used in direct querying scenarios.
Time Calculation Wizard
The Time Calculation wizard is used to generate a variety of date-time calculations on the fly, such as year to date, last n number of time periods, and comparisons of given time periods. The output is custom elements including lists and formulas, which can then be saved, shared, and added to queries.
The calculations are performed on a selected date-time column; the granularity of this input column should correspond to that of the required calculation. For instance, if you want to generate a list of the last 3 years, you need to input a 'year' column. There is a range of calculations that can be performed using a date-time column, but to fully leverage the Time Calculation wizard, it's best to add Time Intelligence columns to the model in the Data Flow.
Date Parts
When working with an SQL data source Users can also create custom column date parts on the fly in Discover from a date-time column. This function is used to virtually append granular details to an existing data model. This differs from Time Intelligence, which adds the new columns to the database schema.
The date part functions extract date-time groupings (like year, quarter, month, week) from raw date-time columns in a SQL database. These columns can be added to the current query but cannot be saved or shared and cannot be used to drive logic from the Time Calculation wizard. Custom column date parts are a good solution for users working with an SQL data source via direct query.
Configuring Time Intelligence
- Connect the Time Intelligence to a table node containing the relevant date or date/ time column.
- From the Properties panel, go to the Time Intelligence Node window and select the date/ time column you want to perform time intelligence on, then deselect any columns you don't want to include.
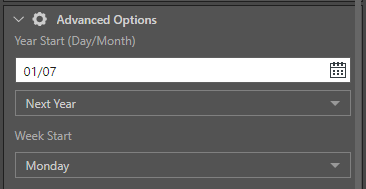
- Open the Advanced Options window to set your year and week start dates. Choose the start day and month from the calender of either the current year or next year; the given date will be treated as the first day of the year. This enables you to set the year start from a date other than January 1. Next, choose the week start; select the day that should be treated as the first day of the week.
- From the Preview panel, click the preview icon to load a preview of the table with time intelligence columns.
Note: You can create this intelligence for more than one date time field per model.

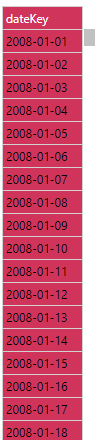
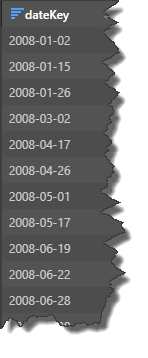
In this example, the data source contained a basic date-time column called dateKey, in the format YYYY-MM-DD:
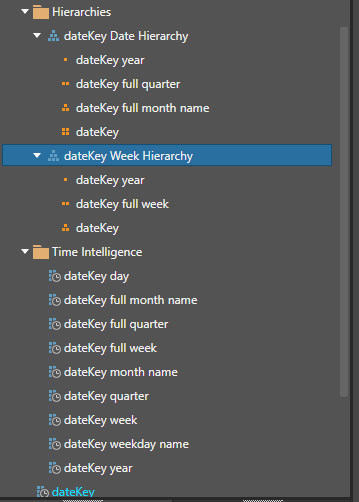
By adding Time Intelligence to the model, a range of new date/ time groupings were extracted from the source column. These columns are now accessible from the Hierarchies and Time Intelligence folders in Discover:
Users can create queries based on any of these new date/ time groupings, rather than relying on the original date-time column. As we see below, this makes date/ time analysis much more user-friendly and manageable. In the following grid, we can navigate between year, quarter, month, and date levels:

Advanced Options
The advanced options are used to define the year start day and month and the week start day. By default, the first day of the year is 01/01 (01 January) of the first year in the source column, and the first day of the week is Sunday.
You can customize both the year start and the week start, which is important if you want to build time intelligence for the fiscal or tax year, or if your organization defines the week start as Monday, for instance.
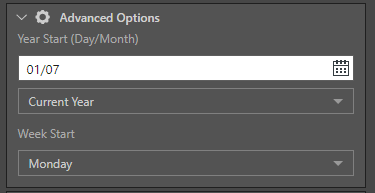
- Year Start: set the first day of the year using the format Day/ Month.
- Current Year vs Next Year: set the start year to the first year (the current start year) in the source column, or to the second year (the next year) in the source column.
- Week Start: set the first day of the week.
In this example, the dateKey column lists dates from 01 January, 2008 to 31 December 2010. We want to change this from calender year to fiscal year, starting 01 July 2008. This presents us with the following question: is 01/06/2008 the beginning of the 2008 fiscal year, or the 2009 fiscal year?
If July 01 2008 should be the start of the 2008 fiscal year, we need to set the start year to 'Current Year':
This sets the new start year to the (current) start year in the source column, which is 2008. Dates from 01 Jan - 30 Jun 2008 will then be placed in 2007.
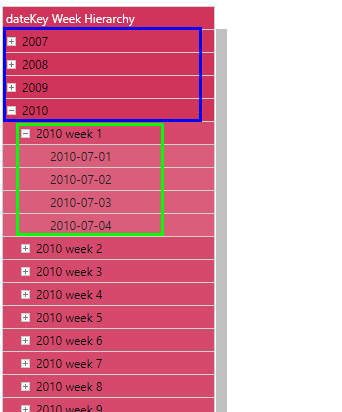
As we see in the grid below, the new column will measure from 2007 - 2010 (blue highlight), with the first day of each year being 01 July (green highlight):
However, if 01 July 2008 should be the start of the 2009 fiscal year, we need to set the year start to 'Next Year':
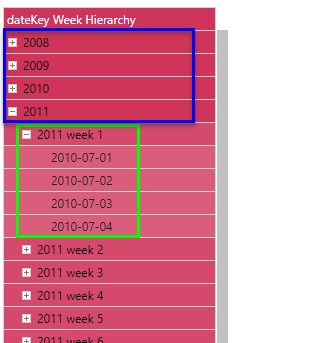
This sets the start year to one year after the (current) start year in the source column, which is 2008. So dates from 01 Jan - 30 Jun 2008 will then be placed in 2008, and 01 Jul - 30 Jun will be placed in 2009. And as we see in the next grid, the new column will therefore measure from 2008 - 2011 (blue highlight), with each year starting on 01 July (green highlight):
Time Intelligence Outputs
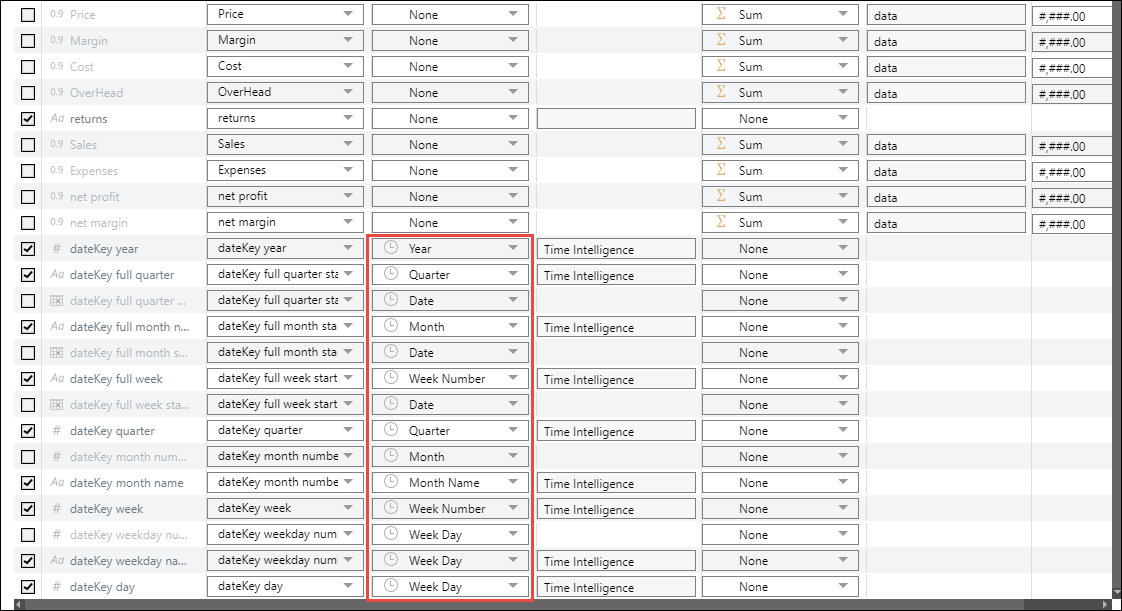
Progressing to the Data Model component, you'll see under Tables that each column generated by the Time Intelligence node is automatically assigned to the relevant category:
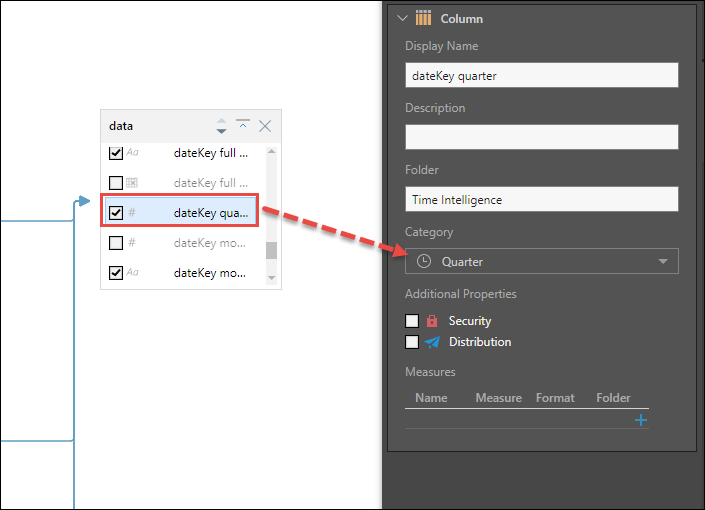
This can also be viewed from Columns:
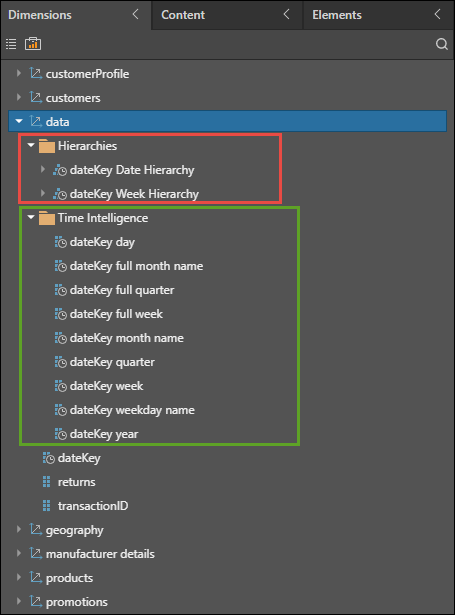
When the model is opened in Discover, we see the Time Intelligence components in two locations in the Dimensions tree:
Hierarchies: the Time Intelligence automatically creates logical hierarchies from the date/ time columns and places them in the Hierarchies folder (red highlight below).
Time Intelligence: each column generated by the Time Intelligence node is automatically placed in a Time Intelligence folder (green highlight).
Related information
Common Properties
There are a number of fields that are present in the Properties panel when you have any of the preceding nodes selected on the canvas. These fields include Result Properties, Column Selection, Set Variable Values, and Metadata.
- Click here for more details about the Common Properties